
A black spot on your laptop screen can turn a normal work session into a source of quiet frustration, especially when it appears during a video call or an important presentation. Whether you use a Dell, HP, Lenovo, or any other brand, this issue is more common than most people realize, and it does not always mean permanent damage. Sometimes it is a simple dead pixel, sometimes trapped dust, and sometimes a deeper hardware issue. Most black spots can be diagnosed and fixed without a repair shop. This guide explains why these spots appear, how to identify your specific cause, and the safest steps to remove or repair them.
What Is a Black Spot on a Laptop Screen?
A black spot on a laptop screen usually appears as a small, dark mark that stands out clearly against lighter backgrounds, such as a white document or a bright webpage. It can look like a tiny dot, a slightly larger blotch, or even a faint smudge that seems to shift depending on the angle at which you view the screen. In most cases, this spot does not move or change shape, which helps distinguish it from temporary display glitches. Understanding what you are actually looking at is the first step before attempting any fix, since different appearances often point to different underlying causes, ranging from something as minor as dust to something as serious as internal panel damage.
Common Appearance: Small Dot vs Larger Patch
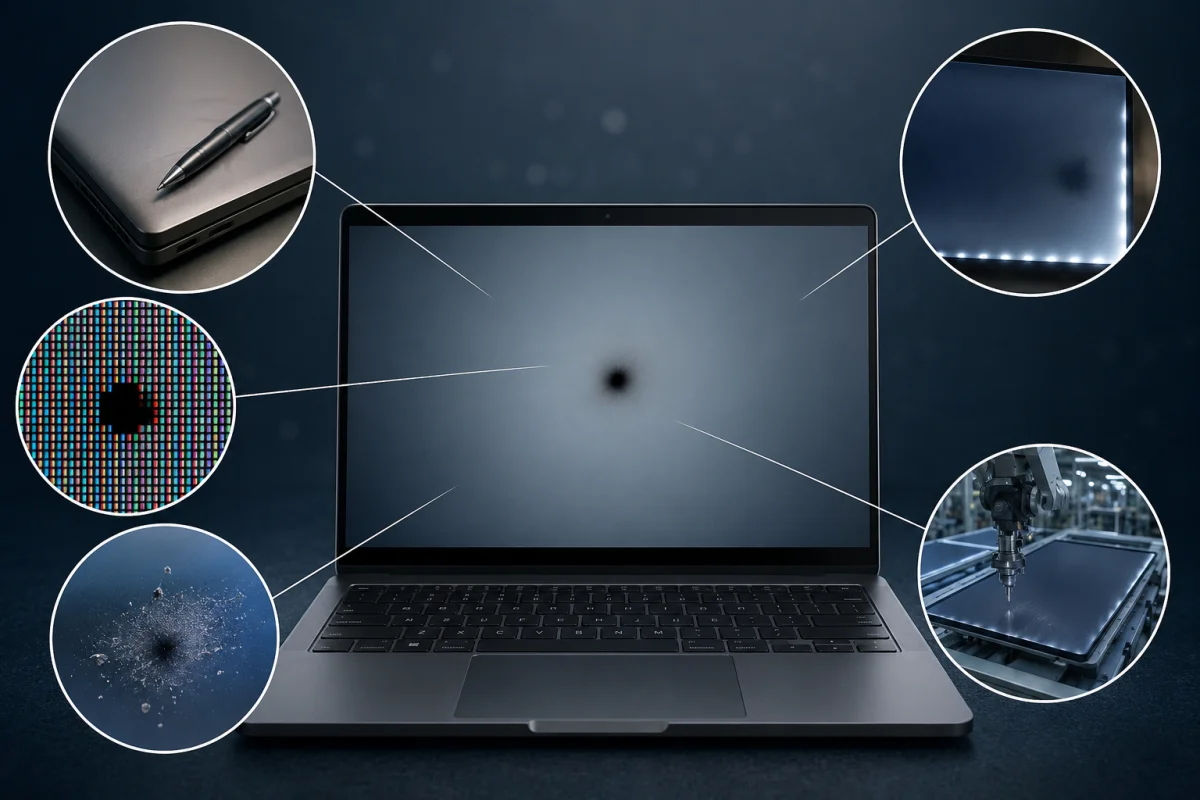
The size and shape of the spot often reveal a lot about its origin. A tiny, pinpoint-sized dot that remains black regardless of what is displayed usually indicates a dead pixel, since a single pixel cluster has failed to receive power or signal. A larger patch, especially one with slightly blurred or uneven edges, is more commonly associated with physical pressure damage or an impact that affected the display panel beneath. If the spot appears to have a faint grayish tint rather than pure black, dust or debris trapped between the screen layers is more likely the explanation.
Is It a Software Glitch or Hardware Damage?
Before assuming the worst, it is worth ruling out software-related causes. Sometimes a stuck rendering issue, a corrupted display driver, or even a temporary graphics processing error can create a dark patch that disappears after a restart or a driver update. A genuine hardware issue, on the other hand, will persist across every application, every boot, and even in the BIOS or UEFI screen before the operating system loads. If the black spot remains visible on the BIOS setup screen, it is a strong indicator that the problem lies with the physical display rather than with any software running on top of it.
Why Is There a Black Spot on Your Laptop Screen?
Understanding the root cause of a black spot is essential before choosing a fix, since applying the wrong solution can waste time or, in some cases, worsen the damage. Laptop screens are delicate, layered components, and a dark mark can originate from several sources, including physical stress, internal debris, electronic failure, or even a defect present from the moment the laptop left the factory. Dell, HP, Lenovo, and other brands all use similar LCD or LED panel technology, so the underlying causes tend to be consistent across brands, even though the exact repair process may vary slightly depending on the model and warranty terms.
Physical Pressure or Impact Damage
One of the most frequent causes of a black spot is physical pressure applied to the screen, often from something as simple as closing the lid with a pen, cable, or small object left on the keyboard. This pressure can crack or bruise the display’s internal layers without shattering the visible glass, leaving a dark patch that gradually becomes more noticeable. Accidental drops, bumps during transport, or leaning on a closed laptop can create similar internal stress. These marks typically do not disappear on their own and often indicate physical damage to the LCD panel itself.
Dead or Stuck Pixels
A dead pixel occurs when an individual pixel fails to receive power and remains permanently black regardless of what is displayed on screen. A stuck pixel is slightly different, showing a single color like red, green, or blue instead of changing with the image, though it can sometimes appear black depending on lighting. These issues are usually caused by manufacturing imperfections rather than user error, and while a single dead pixel is often minor, clusters of them can form a more noticeable black spot that affects the overall viewing experience.
Trapped Dust or Debris Under the Screen
Dust, hair, or tiny debris particles can occasionally find their way beneath the screen’s protective layers during manufacturing or after the laptop is opened for repairs. Over time, these particles can settle into a fixed position and appear as a grayish or black smudge, particularly noticeable on lighter backgrounds. Unlike dead pixels or panel damage, this type of spot is not permanent damage to the display itself, meaning it can potentially be cleaned or removed without needing a full screen replacement, provided the laptop is opened carefully by someone experienced with internal components.
LCD Panel Damage or Backlight Issues
Deeper hardware problems within the LCD panel or its backlight system can also produce black spots, especially if the laptop has experienced heat stress, moisture exposure, or aging components. A failing backlight may create uneven dark patches rather than a single defined spot, often accompanied by flickering or dimming in the same area. This type of damage generally requires professional repair or full panel replacement, since backlight and panel issues cannot be resolved through cleaning or software adjustments.
Manufacturing Defects
In some cases, a black spot is present from the very beginning, resulting from a defect introduced during manufacturing. This might include improperly sealed panel layers, faulty pixel wiring, or contamination that occurred before the laptop was ever packaged and shipped. Manufacturing defects are typically covered under standard warranty policies, so it’s worth checking your laptop’s warranty status early, especially if the spot appeared shortly after purchase and shows no signs of physical damage or debris underneath the screen.
How to Diagnose the Cause Before Fixing It
Before attempting any fix, it helps to run a few simple diagnostic checks to determine whether you are dealing with a dead pixel, trapped debris, or something more serious, such as panel damage. Skipping this step often leads to wasted time on the wrong solution, such as trying pixel-fixing software when the real issue is physical damage that software cannot repair. A proper diagnosis takes only a few minutes and requires no special tools beyond a browser and close attention to how the spot behaves under different conditions, including screen background, brightness, and whether the laptop is running or completely powered off.
Quick Pixel Test Using Free Online Tools
Several free websites are designed specifically to test for dead or stuck pixels by displaying full-screen colors such as pure white, black, red, green, and blue in sequence. Running this test lets you see whether the black spot remains fixed in the same location and shape across all colors, which strongly suggests a dead pixel or a hardware-related issue. If the spot changes color or disappears during certain screens, this points more toward a stuck pixel rather than a fully dead one. This test takes less than five minutes and is a reliable first step for anyone unsure what they are dealing with.
Checking If the Spot Moves or Changes
Another useful diagnostic method involves gently moving your finger across the outside of the laptop lid, applying very light pressure near the spot, without pressing directly on the screen. If the mark shifts slightly, spreads, or changes shape in response, this often indicates trapped debris or a minor pressure-related issue rather than a permanently dead pixel. You should also check whether the spot appears identically on an external monitor if you connect one, since a spot that disappears on an external display usually indicates that the laptop’s internal screen, not the graphics card, is the actual source of the problem.
When It’s a Hardware Problem vs Display Cable Issue
A damaged display cable can sometimes produce symptoms that resemble a black spot, though this usually appears alongside flickering, partial screen discoloration, or complete blackout when the laptop lid is adjusted to certain angles. If gently opening and closing the lid causes the spot to worsen, flicker, or briefly disappear, the display cable connecting the screen to the motherboard may be loose or partially damaged rather than the panel itself. This distinction matters because a cable issue is often a simpler, cheaper repair than replacing the entire LCD panel, making it worth testing before assuming the worst-case scenario.
How to Fix a Black Spot on a Laptop Screen (Step-by-Step)
Once you have a reasonable idea of what is causing the black spot, you can move on to actual fixes, starting with the safest and simplest options before considering anything more invasive. Not every method will work for every cause, since a dead pixel requires a different approach from trapped dust, and neither can be resolved the same way as physical panel damage. Working through these steps in order, from software adjustments to more hands-on techniques, helps you avoid unnecessary risk while giving you the best chance of resolving the issue without professional help or a costly screen replacement.
Restarting and Updating Display Drivers
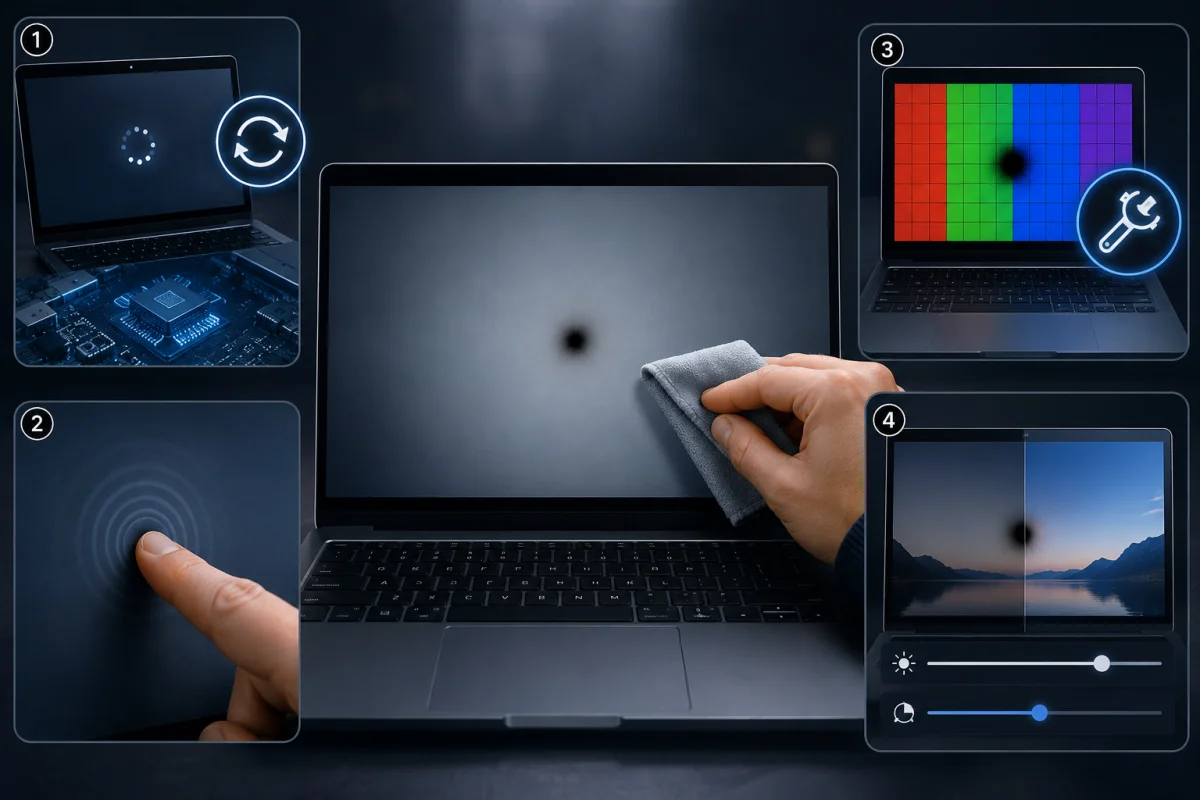
The simplest fix to try first is restarting your laptop completely, since this can resolve temporary rendering glitches that sometimes mimic a genuine black spot. If the spot persists after restarting, updating your display or graphics drivers through Device Manager or the manufacturer’s support page can rule out software-related causes, such as outdated or corrupted driver files. Dell, HP, and Lenovo all provide dedicated support tools such as Dell Command Update, HP Support Assistant, and Lenovo Vantage, which can automatically detect and install the correct driver versions for your specific model without requiring manual searching.
Gentle Pressure Massage Technique (Stuck Pixel Method)
For stuck pixels specifically, a gentle massage technique is often recommended: power off the laptop, then use a soft microfiber cloth to apply very light, circular pressure directly over the affected area for 10 to 15 seconds. This method works by temporarily restoring the pixel to normal operation, though it should never be attempted with excessive force, as this risks causing physical damage to the panel. After applying pressure, turn the laptop back on and check whether the spot has reduced in size or disappeared entirely. Repeat the process a few times if there is only partial improvement.
Using Pixel Fixing Software Tools
Several free and reputable software tools are designed specifically to fix stuck pixels by rapidly flashing different colors over the affected area of the screen, which can help reactivate a pixel that is stuck rather than fully dead. These tools typically run for several minutes and work best when combined with the manual massage technique described above, since the flashing colors stimulate the pixel electronically while gentle pressure works mechanically. It is worth noting that these tools have no effect on dead pixels or physical damage, so if you have already confirmed through testing that the pixel is fully dead, this method is unlikely to produce noticeable results.
Adjusting Screen Brightness and Refresh Rate
In some cases, simply adjusting your screen brightness or refresh rate settings can make a subtle black spot less noticeable, particularly if the underlying cause is a minor backlight inconsistency rather than a fully dead pixel or physical damage. Lowering brightness slightly can reduce contrast between the spot and its surrounding pixels, while adjusting refresh rate settings in Display Settings may help with certain rendering-related glitches. While this approach does not fix the underlying issue, it can serve as a practical, temporary workaround for anyone who needs to continue using their laptop as usual while planning a more permanent repair.
How to Remove Black Spots Caused by Dust or Debris
When trapped dust or debris is the confirmed cause behind a black spot, the good news is that this type of issue does not involve permanent internal damage, meaning it can potentially be resolved through careful cleaning rather than a full screen replacement. However, this process requires patience and a cautious approach, since laptop screens are fragile and improper handling can easily turn a minor cosmetic issue into a much more expensive problem. Knowing exactly what tools and techniques are safe to use, and just as importantly, what to avoid entirely, makes the difference between successfully clearing the debris and accidentally damaging the display panel beyond repair.
Safe Cleaning Methods for Laptop Screens
If the debris is trapped on the outer surface rather than beneath internal layers, a soft microfiber cloth lightly dampened with distilled water is usually sufficient for gentle cleaning, always applied in slow circular motions rather than aggressive scrubbing. For debris trapped beneath the screen’s protective layers, professional disassembly is generally required, since opening a laptop screen involves removing delicate bezels, ribbon cables, and adhesive strips that are easy to damage without proper tools and experience. If you are comfortable with basic laptop repair, manufacturer service manuals for Dell, HP, and Lenovo models often include step-by-step disassembly instructions specific to your exact model number.
What NOT to Use on Your Screen
Certain cleaning products and tools should never come into contact with a laptop screen, including ammonia-based glass cleaners, paper towels, tissues, or any abrasive material that can scratch the anti-glare coating on many screens. Compressed air should also be avoided when used too closely or aggressively, since strong bursts of air can push debris deeper into the panel rather than dislodging it outward. Similarly, avoid using excessive liquid of any kind, since moisture seeping into the edges of the screen can cause far more serious damage than the original black spot, including internal corrosion or complete panel failure.
Black Spots on Dell, HP, and Lenovo Laptops: Any Differences?
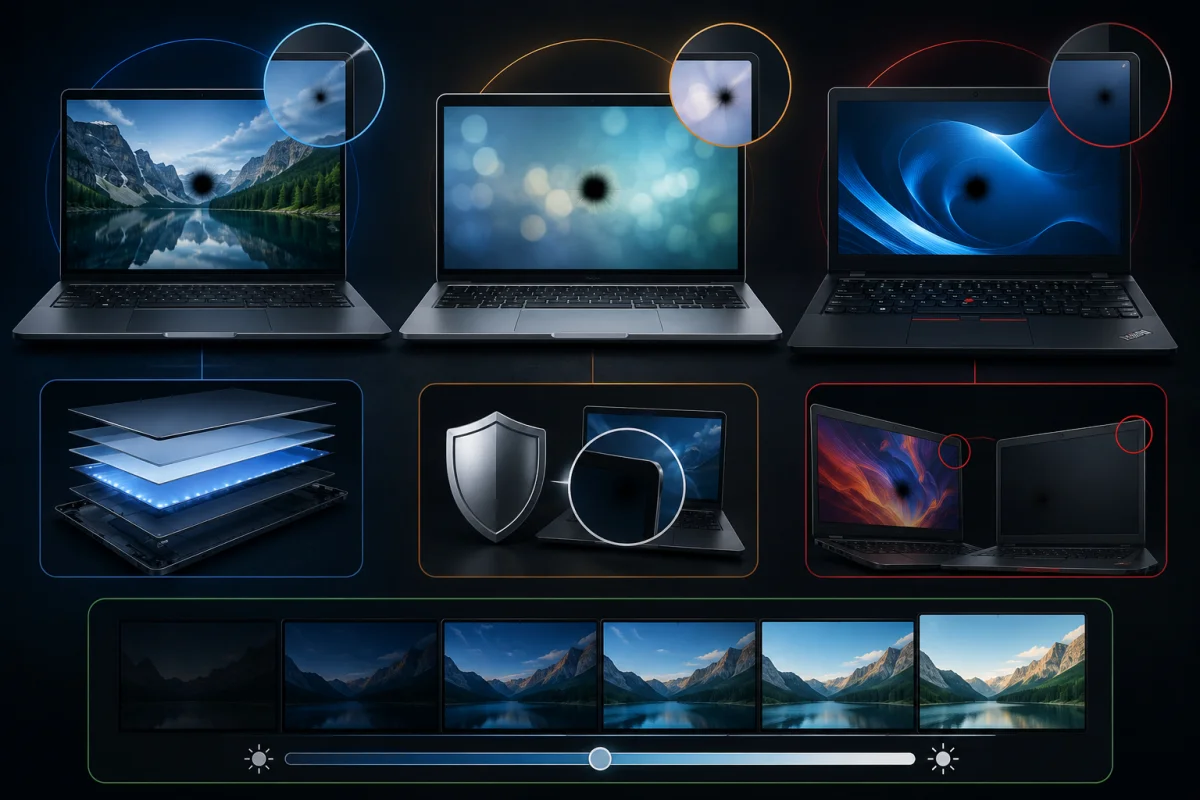
While the underlying causes of black spots remain largely consistent across all laptop brands, the repair process, warranty coverage, and available support tools can differ noticeably between Dell, HP, and Lenovo devices. Each manufacturer has its own diagnostic software, service policies, and typical panel suppliers, which can influence both how quickly an issue is identified and how much a repair ultimately costs. Knowing these brand-specific details ahead of time can save you from unnecessary back-and-forth with customer support and help you set realistic expectations for repair timelines, especially if your laptop falls just outside its standard warranty period.
Dell Screen Panel Considerations
Dell laptops often use panels sourced from a mix of manufacturers, depending on the model and production batch, so two units of the same laptop could technically have panels from different suppliers. Dell’s official diagnostic tool, accessible through Dell SupportAssist, can run a built-in display test that helps confirm whether a black spot is hardware-related before you contact support. Dell also tends to offer relatively straightforward screen replacement services through authorized repair centers, with pricing that varies based on whether your model uses a standard or higher-resolution panel.
HP Display Warranty Notes
HP laptops typically come with a limited one-year warranty that covers manufacturing defects, including certain dead-pixel thresholds, though the exact number of acceptable dead pixels before a screen qualifies for a free replacement varies by policy and region. HP Support Assistant offers a built-in hardware diagnostic feature that can help quickly confirm display-related issues, which is useful before booking a repair appointment. It is worth checking your specific warranty documentation carefully, since HP’s dead pixel policy is often stricter than expected, sometimes requiring multiple visible pixels within a certain distance of each other to qualify.
Lenovo IdeaPad and ThinkPad Screen Quirks
Lenovo laptops, particularly ThinkPad models, are generally known for their more durable screen construction due to their business-oriented design, though this does not make them entirely immune to black spots caused by pressure damage or manufacturing defects. Lenovo Vantage software includes a hardware scan feature that can help identify display issues, and Lenovo’s premium care warranty options often provide faster turnaround times for screen repairs compared to standard warranty coverage. IdeaPad models, being more consumer-oriented, may use slightly less robust panel protection, making careful handling especially important to avoid pressure-related black spots over time.
When to Repair vs Replace the Screen
Deciding whether to repair a black spot or replace the entire screen depends on several factors, including the severity of the damage, your laptop’s age, and whether the repair cost is reasonable relative to the device’s value. A single small dead pixel might not justify a full panel replacement, especially on an older laptop nearing the end of its useful life, whereas a larger patch caused by physical damage often leaves no choice but to replace the panel. Taking time to weigh these factors before committing to a repair can help you avoid spending more money than the laptop is actually worth in its current condition.
Cost of Screen Replacement by Brand
Screen replacement costs vary significantly depending on your laptop brand, model, and screen resolution, with standard HD panels generally costing less than higher-resolution or touchscreen displays. Dell and HP replacement panels for mainstream consumer laptops typically fall within a moderate price range, while premium models with 4K or OLED displays can cost substantially more due to specialized components. Lenovo ThinkPad panels, particularly those with higher durability ratings, may also carry a slightly higher price tag compared to standard IdeaPad models. Getting quotes from both the manufacturer and independent repair shops before committing can help you find the most reasonable price for your specific situation.
Is It Covered Under Warranty?
Before paying out of pocket for any repair, it is worth checking whether your laptop is still covered under a standard warranty or an extended protection plan, since manufacturing defects and certain dead pixel thresholds are often covered at no cost. Each manufacturer has specific policies on how many dead or stuck pixels qualify for a free replacement, so reviewing your warranty documentation or contacting support directly can clarify whether your case qualifies. If your laptop is out of warranty, some manufacturers still offer discounted out-of-warranty repair services, which can be considerably cheaper than paying full price through an independent repair shop.
How to Prevent Black Spots From Appearing Again
Preventing future black spots is often easier and far less costly than dealing with repairs after the damage has already occurred, especially since most causes stem from avoidable habits rather than unavoidable defects. Simple changes to how you handle, store, and clean your laptop can significantly reduce the risk of pressure damage, trapped debris, or premature panel wear. Building these habits into your regular routine takes very little effort once they become second nature, and the long-term payoff is a screen that stays free of dark marks and maintains consistent display quality throughout the laptop’s entire lifespan.
Proper Laptop Storage and Handling
Always check the area around your keyboard for pens, cables, coins, or any small objects before closing the lid, since even minor pressure from a forgotten item can cause lasting damage with repeated closures. When carrying your laptop, use a padded sleeve or bag with a dedicated compartment rather than tossing it loosely alongside other items that could press against the lid. Avoid stacking heavy objects on top of a closed laptop, and be mindful when placing it inside tight backpack compartments, since consistent pressure in the same spot is one of the most common preventable causes of screen damage over time.
Screen Protectors and Cleaning Habits
Applying a quality screen protector designed specifically for laptops adds a layer of defense against dust, minor impacts, and accidental scratches without affecting display clarity. Make it a habit to clean your screen regularly with a soft microfiber cloth, ideally once or twice a week, to prevent dust buildup around the edges, where it can work its way beneath the bezel. Keeping your laptop closed when not in use, especially in dusty environments, and avoiding eating or drinking near an open laptop also helps keep your screen free of debris-related black spots. Acting early with the right diagnostic steps gives you the best chance of a simple fix rather than a costly replacement.



)
&description=&image=https://techwelo.com/wp-content/uploads/2026/07/black-spot-on-laptop-1024x683.webp)